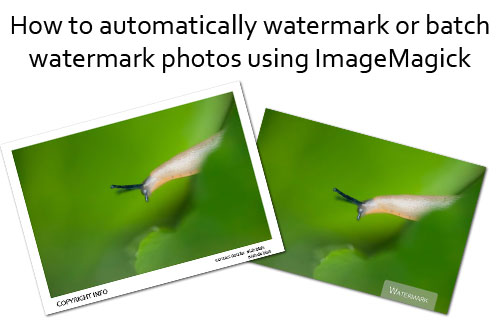
In this article I’ll share a couple of ways to use ImageMagick to add a watermark to a photo. ImageMagick is a command line program, which is perfect for this job as that means it can scripted.
I use it on my photography website so I can upload original size photos, then the images can automatically be resized and have a watermark added. I won’t go into detail on the image resizing in this article, as I have a feeling the article will already be quite long. But maybe I will cover that aspect in a future article.
Overlay type watermark
First let’s take a look at adding a watermark that covers up part of the image, the standard style watermark that you’ll see on photos.
Designing your watermark
Assuming that you’re going to be automatically applying the watermark to photos, it is important to think about the tones being used in the watermark. A white watermark will show up well in a dark photo, but will be hidden in a bright photo. Further, what if the watermark is positioned over an area of a photo that contains both light and dark areas – only parts of the watermark would be visible.
For this reason, it makes sense to me to use a watermark with a background. Below you can see an example showing plain text watermarks in white and black versus a watermark incorporating a background. With the background the watermark is easily visible no matter what colour background the image has.
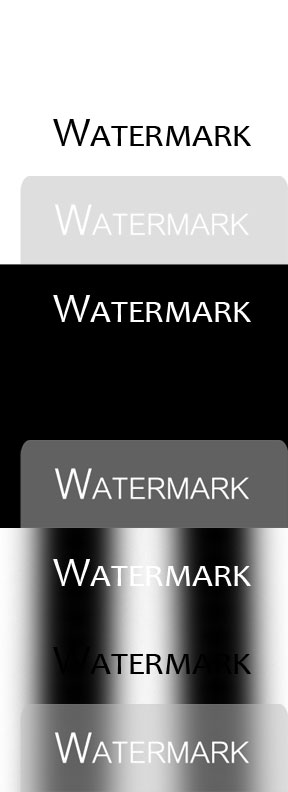
The style of your watermark is obviously completely up to you. I have gone for a grey background at 50% opacity with white text at 100% opacity on top.
You’ll probably want to create your watermark using a graphics editing program with a GUI. Though you could make something like this completely in ImageMagick if you desired.
If the watermark is intended to be applied to only a couple of different image sizes, then I suggest saving out versions of the watermark suited to those sizes of images.
ImageMagick can handle SVG files, which will scale to any size. But I would suggest using a raster format such as PNG instead. It ensures the watermark will be rendered correctly, and I suspect it should be faster.
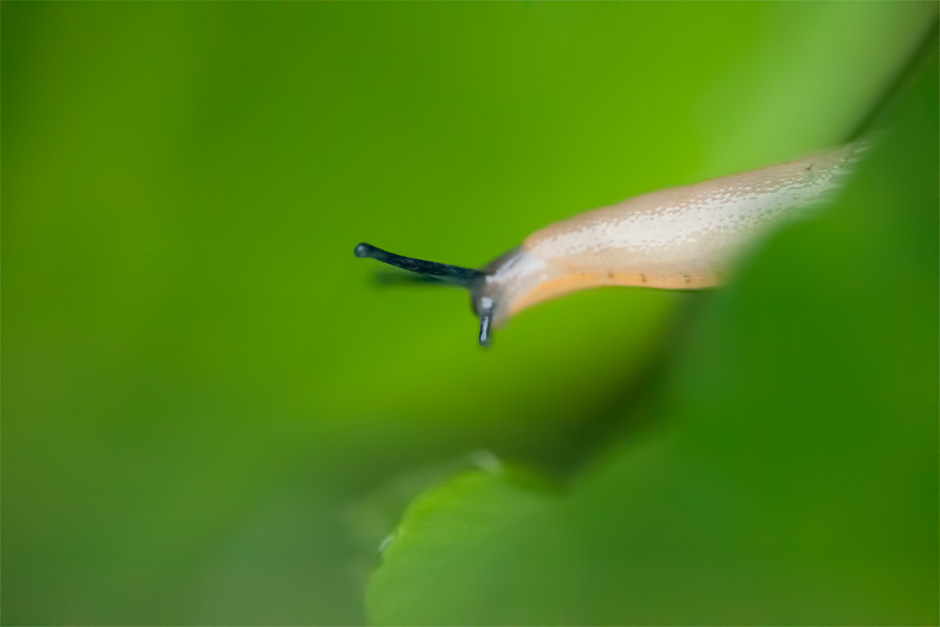
Now let’s look at using ImageMagick to apply the watermark. If you’d like to follow along with the commands, you can download the files used: photo.jpg, watermark.png, watermark.svg, watermark-small.png
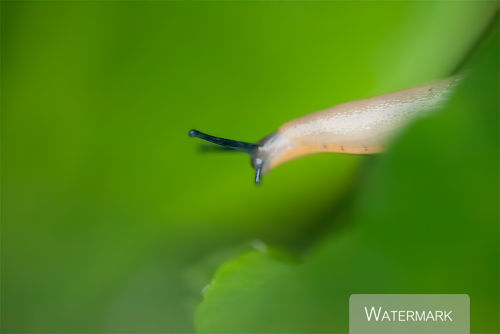
A watermark can be added to an image using the composite command:
composite -compose atop -geometry +75 -gravity southeast ./watermark.png ./photo.jpg ./photo-watermarked.jpg

(Click image to view actual image output)
If using an SVG image as the watermark you need to add -background none to the command to stop a white background being applied to the SVG, and also add the height the SVG should be resized to in pixels e.g.
composite -compose atop -geometry x59+75 -gravity southeast -background none ./watermark.svg ./photo.jpg ./photo-watermarked.jpg
Of course, generally you’ll want to apply the watermark at the same time as resizing, and performing other operations on an image. Thankfully the same arguments will also work as part of a convert command, e.g.
convert \
-filter Lanczos \
./photo.jpg \
-set option:filter:filter Lanczos \
-set option:filter:blur 0.8 \
-resize 500x500 \
-quality 80 \
./watermark-small.png -gravity southeast -geometry +30 -composite \
./photo-500px-watermarked.jpg
(If you’re working on windows you’ll need to replace the \ new line escape characters with a ^ instead. Or miss out the escape characters and put the command all on a single line.)
So, let’s look at the ImageMagick parameters involved with adding a watermark and what they mean:
- -gravity
-
Sets where in the image the watermark should be added. In these examples I’m using southeast, which puts the watermark in the bottom-right corner. You can use whatever direction you want, e.g. north for top centre. More info on the ImageMagick website: Command line options -gravity.
- -geometry
-
Geometry can be used to modify the size of the watermark being passed in, and also the positioning of the watermark (relative to the gravity placement). It is specified in the form width x height +/- horizontal offset +/- vertical offset.
If you have your watermark images already set to the correct size for usage, then you only need to specify the offset you want (if any). In my examples I’m specifying a positive horizontal offset, which pushes the watermark in from the right edge. More info on the ImageMagick website: Command line processing -geometry.
- -composite
-
Lastly comes the -composite parameter, which tells ImageMagick to add the watermark image we’ve just specified to the image. More info on the ImageMagick website: Command line options -composite.
Border type watermark
For a border type watermark, the copyright notice or contact details are printed in a border round the image, rather than overlaying the image itself.
For this you will likely want a border that is larger in one direction (typically at the the bottom of the image), where the watermark can be added. ImageMagick doesn’t allow setting the border width as larger in only one direction (as far as I’m aware). But this can be worked around quite easily.
-bordercolor white -border 20x18 -gravity South -background white -splice 0x15
The above parameters can be added to a resize command to add the wanted border around the image. Let’s break it down:
- -bordercolor
-
Sets the colour of the border (who would’ve guessed?) You can read more about the different ways to specify color on the ImageMagick website: Command line options -fill.
- -border
-
Sets the border width on the x axis and the border height on the y axis. So in this example I am using a 20 pixel border left and right, and an 18 pixel border top and bottom. More info on the ImageMagick website: Command line options -border.
- -gravity
-
In this case we’re using gravity to control the placement of our border extension. Since I want the border to be larger at the bottom of the image, I’ve specified -gravity South.
- -background
-
Background specifies the background colour to be used for our border extension. You’ll want this to the be same colour as your border, in my case, white.
- -splice
-
Is how the border is extended to the bottom of the image. Splice adds rows or columns to the image. Specifying a value of 0x15 means add no columns (which would affect the width) and add 15 pixels in height. Since we have set the gravity to South, the extra 15 pixels of height will be added to the bottom of the image. More info on the ImageMagick website: Command line options -splice.
Then the same arguments used to add an overlay style watermark can be used to add a watermark image to the border. You can actually add multiple watermarks, for example:
convert /
-filter Lanczos /
./photo.jpg /
-set option:filter:filter Lanczos /
-set option:filter:blur 0.8 /
-resize 500x500 /
-quality 80 /
-bordercolor white -border 20x18 -gravity South -background white -splice 0x15 /
./border-wm-left.png -gravity southwest -geometry +29+11 -composite /
./border-wm-right.png -gravity southeast -geometry +29+5 -composite /
./photo-500px-bordered.jpg
If you’d like to try this command with the same files as I used, you can download the files used: photo.jpg, border-wm-left.png, border-wm-right.png
Then to automatically apply the watermark to images, it’s just a case of incorporating the relevant ImageMagick parameters as part of your image processing script. As I said earlier, you’ll probably want to be doing other things to your images at the same time, such as resizing, sharpening, and converting to sRGB for web usage. If I get time, I’ll cover these in a future article.
However, since I did title this article How to automatically watermark or batch watermark photos using ImageMagick
, I guess I should show something about how to actually batch add a watermark.
Windows
@echo off
FOR %%i IN (./\*.jpg ./\*.jpeg) DO (
	IF NOT EXIST ./\watermarked mkdir watermarked
	convert ^
	-filter Lanczos ^
	"%%i" ^
	-set option:filter:filter Lanczos ^
	-set option:filter:blur 0.8 ^
	-resize 500x500 ^
	-quality 80 ^
	../watermark-small.png -gravity southeast -geometry +30 -composite ^
	"./watermarked/%%~nxi"
)
Linux / Mac
for i in ./*.jpg ./*.jpeg
do
	if [ ! -d "./watermarked" ]; then mkdir "./watermarked"; fi
	filename=$(basename "$i")
	~/apps/ImageMagick/bin/convert \
	-filter Lanczos \
	"$i" \
	-set option:filter:filter Lanczos \
	-set option:filter:blur 0.8 \
	-resize 500x500 \
	-quality 80 \
	../watermark-small.png -gravity SouthEast -geometry +30 -composite \
	"./watermarked/$filename"
done
The above script will take all .jpg or .jpeg files in the current directory, resize to 500px on the longest edge, and add an overlay style watermark to the bottom right corner, indented 30px from the right edge. The watermarked images are then saved in a directory called ‘watermarked’.
You would need to save the script as watermark.bat (windows) or watermark.sh and make it executable (linux and mac). Then place the file in the directory with the images you want to watermark before running it. The script assumes that the watermark file is named watermark-small.png and placed in the parent folder.
Obviously I don’t recommend you use the above script as-is. But if you’re not familiar with shell scripting, it should at least give you a starting point you can work from, and modify to your own needs.
Hi,
Great post! I’m looking for a way to batch watermark gif animated images, i’ve been running this command manually but if i could somehow get it to work in batch it would make my life so much easier
convert 1.gif -coalesce -gravity SouthWest -geometry +0+0 null: 2.png -layers composite -layers optimize 3.gif
This takes 1.gif and 2.png and creates 3.gif which is the watermarked result, any chance you would be able to assist to modify this string to get it to work with batch like you have done for jpg/jpeg?
thanks!
Hi Jonny
I’m away at the moment, and ImageMagick isn’t something I use all the time, so I’m afraid I can’t tell you off the top of my head. I can take a look at it after I get back, but it might be a few weeks as it will be 2 weeks before I get back and I I already have quite a few tasks piled up.
Regards
Dave
Hi Jonny
I’ve had a look at this now and realise it was more of a batch scripting question than ImageMagick question you had. Yes, your command can certainly be used as part of a batch script. The exact script will depend on how you store your files and whether you’re on Windows or Linux / Mac.
To give an example, let’s say I have a folder called ‘imgs’, which is full of animated GIF images that I want to batch add a watermark to. In the parent directory above ‘imgs’ I have my watermark file, named ‘watermark-small.png’. I also create a text file here, which I name watermark.bat (because I’m using Windows). I open up this file in Wordpad / Notepad, and add the following:
@echo offIF NOT EXIST ./\watermarked mkdir watermarked
FOR %%i IN (./\imgs/*.gif) DO (
echo "watermarking ./imgs/%%i"
	convert "./imgs/%%i" ^

	-coalesce ^

	-gravity SouthWest ^

	-geometry +0+0 null: ./watermark-small.png ^

	-layers composite ^

	-layers optimize "./watermarked/%%~nxi"
)
When I run this file (watermark.bat) it will first check whether the folder ‘watermarked’ exists, and create it if it doesn’t:
IF NOT EXIST ./\watermarked mkdir watermarked.Next it will loop through all the GIF files in the ‘imgs’ directory:
FOR %%i IN (./\imgs/*.gif) DO (For each image it will watermark it and save it to the ‘watermarked’ directory:
convert "./imgs/%%i" ^-coalesce ^
-gravity SouthWest ^
-geometry +0+0 null: ./watermark-small.png ^
-layers composite ^
-layers optimize "./watermarked/%%~nxi"
I hope that helps, if you’re still having trouble, let me know. Or if you’re on Linux / Mac let me know and I can give you the equivalent script needed.
Regards
Dave
Hi Dave,
great script – would you mind publishing your Linux version as well?
Thx
Chris
Hi Chris
Sorry for the delayed reply, my hard drive that I do all my web work on died and the replacement was pretty slow to be dispatched, so I had no linux available for a while. Anyway, in answer to your question, here is the equivalent as a shell script for linux / mac:
if [ ! -d "./watermarked" ]; then mkdir "./watermarked"; fifor i in ./imgs/*.gif
do
filename=$(basename "$i")
echo "watermarking ./imgs/$filename"
convert "./imgs/$filename" \
-coalesce \
-gravity SouthWest \
-geometry +0+0 null: ./watermark-small.png \
-layers composite \
-layers optimize "./watermarked/$filename"
done
Remember that after you save it in a file, you need to change the permissions of the file to allow executing it. I hope that helps.
Regards
Dave
Hi
Great job !
I want to batch all image (different size) with only one text – autoresize
Please help me !
my email : ychi1987@gmail.com
And how to automatically watermark – autoresize or batch watermark – autoresize on photos – different size
Sorry, My english bad ^^!
Hi Tung
I’m not sure what you mean, the examples provided in the article should work fine with a batch of different size images. What’s the problem you’re having with it?
Kind regards
Dave
(I did email you a while back, but haven’t received a reply, so I’m guessing you didn’t get it?)
Thanks for your message, I’m using VeryUtils Photo Watermark Command Line software, it support command line processing, so I think you can use it to batch add watermarks to all of your photos at one time, you may search “VeryUtils Photo Watermark Command Line” in google to locate it.
Hi Dave,
I too want to add a watermark to tumblr gif’s #. I’ve followed your instructions and copied the code you created for Chris and made it executable. when i run the script it creates a new watermark directory but doesn’t add the watermark to the images/gifs.
Please help
many thanks
Matt
I have hundreds of images to watermark and I’d like to use your method but I’m getting stuck.
All the command line stuff is working fine but when I try the script I get this error:
./watermark.sh: line 1: syntax error near unexpected token `then’
‘oneatermarked/$filename”ravity SouthEast -geometry +30+30 -composite \
I don’t know what it means and Dr. Google isn’t helping much. I copy and pasted your code and made a couple of small changes:
for i in ./*.png
do
if [ ! -d “./watermarked” ]; then mkdir “./watermarked”; fi
filename=$(basename “$i”)
~/apps/ImageMagick/bin/convert \
-filter Lanczos \
“$i” \
-set option:filter:filter Lanczos \
-set option:filter:blur 0.8 \
-resize 1200×1200 \
-quality 80 \
../watermark-small.png -gravity SouthEast -geometry +30+30 -composite \
“./watermarked/$filename”
done
I can’t figure out what is wrong. Can you?
(I’m using a Mac currently)
Thanks for your great article, I’m using VeryUtils Photo Watermark Command Line software, it support command line processing, I could use it to batch add watermarks to all of my photos at one time, I’m happy with it.
OMG, this is exactly what I needed, thank you so much for this!
Originally I wanted to have a “border” image and overlay the photo on top and position it, but having imagemagick do the border and all is awesome! I added a “south” image for the event name, and edit that to suit.
Resultis exactlw hat I was trying to achieve by other means, and soo much quicker! It also means I don’t have to add a watermark in darktable whch increases export time and means if someone wants non-watermarked images I ave to go into each image and revert history. This has sped up my workflow an incredible amount, I am so very grateful. 🙂
Oh, here is mine, no resizing as I export a the size I want:
#!/bin/bash
for i in ./*.jpg ./*.jpeg
do
if [ ! -d “./watermarked” ]; then mkdir “./watermarked”; fi
filename=$(basename “$i”)
/bin/convert \
“$i” \
-quality 95 \
-bordercolor black -border 120×120 -gravity South -background black -splice 0x15 \
./SIFLogo.png -gravity southwest -geometry +20+11 -composite \
./Event.png -gravity south -geometry +0+20 -composite \
./TMCLogo.png -gravity southeast -geometry +20+5 -composite \
“./watermarked/$filename”
done
Results can be found here https://www.facebook.com/pg/swansinflight.nz/photos/?tab=album&album_id=139327787488729 or here https://www.instagram.com/p/B6SjPK5Fy-s/ (some are cut of due to insta making them all the same height; they did all work fine)
Sorry for links being to FB, that’s where the riders are.